A 4-Day Festival Charging Plan: Power Up Without the Rows
Share this article
AI-assisted English translation of the German guide. Illustrative images are AI-generated, not product photos. Numerical claims from the original are contextualised, and safety advice has been clarified. We have not tested this equipment ourselves.
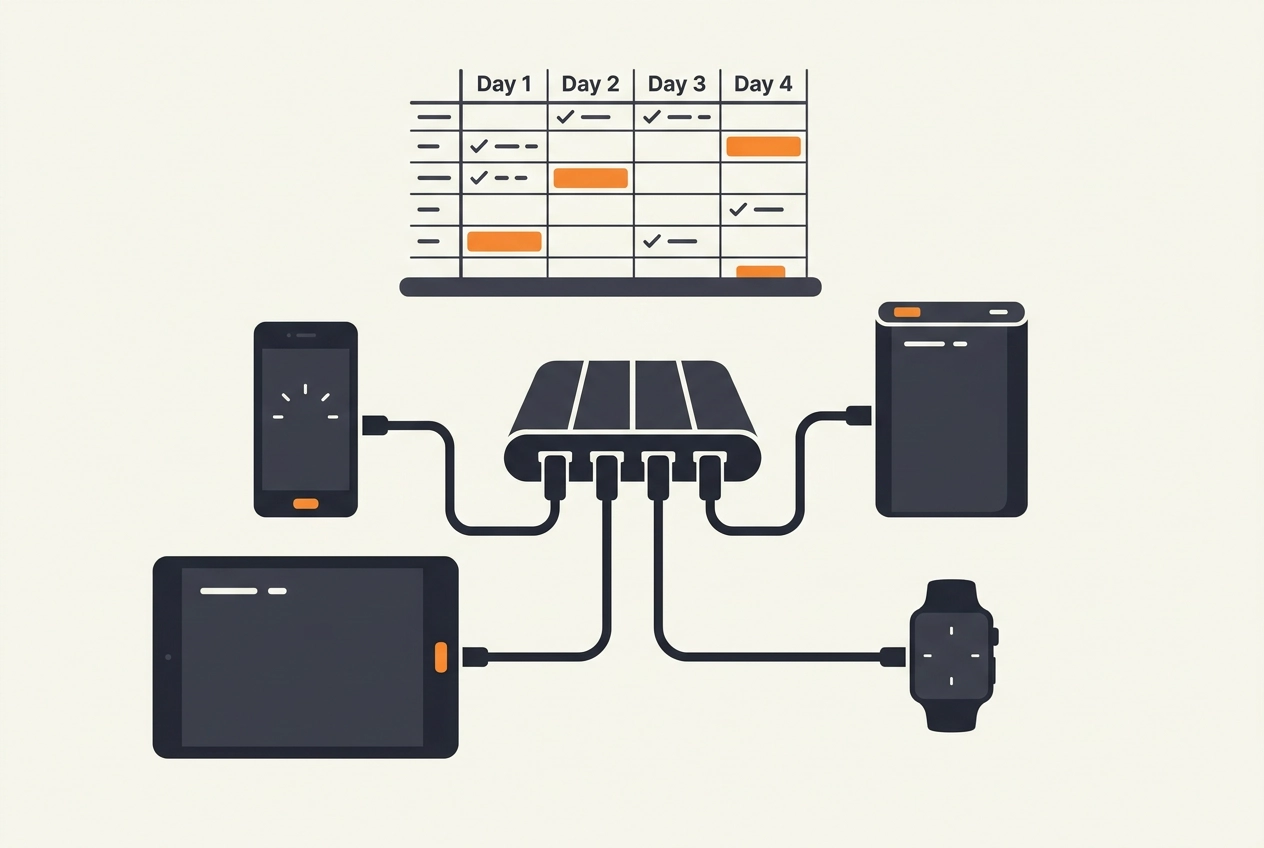
Sound familiar? It’s a great evening, the campfire is crackling, and suddenly someone is standing at the empty charging hub asking, “Who’s nicked my cable?” That’s right where the power problem begins. Not because there aren't enough batteries, but because five people want to charge at the same time, nobody watches the battery level, and before long everyone is wound up. In reality, campsite power is first and foremost a social issue, not a capacity problem.
In this post, we’re putting together a stress-free four-day festival charging plan. We’ll cover what to sort before heading off, why priority tiers save you endless arguments, and how fixed time slots work at a shared hub. You’ll learn why phones shouldn't be left on charge overnight, which four slots work best around the campfire, and which safety rules are completely non-negotiable. We'll also cover cable management, finding the ideal hub spot, the 'charging guard' role for one person at a time, and a ready-to-use checklist. Plus, quick fixes for common hiccups.
Sounds a bit overly grown-up? Perhaps. But it leaves you with far more time for toasted marshmallows, stargazing, and banter. Four days, one plan, and zero arguments around an empty hub. Let’s get into it.
Prerequisites: What to sort before you set off
Before you hit the road, get five things straight. After that, camp life is easy.
1. One hub instead of five half-baked solutions: Decide which power station or multi-port hub will be the central charging spot and who's bringing it. One person, one device, one plug. For power station camping with a group, check your sound and power setups beforehand so the ports actually suit the crew.
2. Equipment inventory: Tally up everything coming along: phones, power banks, head torches, camping lanterns, cameras, Bluetooth speakers, and vapes. Note what connection each device needs.
3. Charger list: Who has which cable and wall plug? The BGN recommends sticking strictly to original chargers, so plan for one proper charger per device rather than a dodgy collection of spares.
4. Cable crate: A sturdy box, labelled pouches, velcro ties, one distinct coloured cable per person, plus a spare cable just in case.
5. Check festival guidelines: Ask the organisers whether campsite power is permitted and what rules apply to power banks on the festival grounds. Policies vary considerably from event to event.
Why campsite power is primarily a social issue
Cable crate packed, hub sorted. Yet on the second evening, the arguments start all over again.
It’s not a capacity issue; it’s a social one: five mates, one hub, one evening. The classic mistake isn't running out of juice, it’s plugging in too many things at once.
Our take, not lab science: after countless festival weekends, we’re convinced that communication is the real bottleneck, not battery capacity. While not an official study, it's our tried-and-tested experience.
Ports are finite: one port charges one device. If you cram three gadgets onto one splitter, you end up with three half-charged batteries and an overheating plug. Daisychaining plugs like this is one of the five most common pitfalls when using camping power stations.
The price of chaos: plug everything in at once in the morning, and by nightfall you're left in the dark, squabbling over an empty hub.
A two-minute chat on arrival day saves rows on night three. And yes, it also avoids bickering over who lugged the power station to camp in the first place.
Priority tiers: who gets to charge first
A two-minute chat isn't enough if nobody knows who goes first. That’s why you need a clear hierarchy beforehand:
Tier 1, Communication: Phones and one power bank as an emergency reserve always charge first. Staying reachable beats playing tunes.
Tier 2, Lighting: Head torches, camping lanterns, and tent lights. That way, nobody trips over guy ropes in the dark.
Tier 3, Group gear: Bluetooth speakers, camera batteries, drones, vapes, and communal power banks. Make sure an owner is assigned to each, or group supplies will vanish into someone’s tent.
Tier 4, Comfort: Tablets, e-readers, electric toothbrushes and similar gadgets only get plugged in if there’s spare juice.
These tiers are based on our experience, not hard-and-fast rules. Tweak them for your crew, but agree on them before the first battery dies. You can find which setups have proven best for us in our 9 recommendations, along with plenty more on campsite power and sound.
Daily routine at the hub: fixed slots over continuous charging
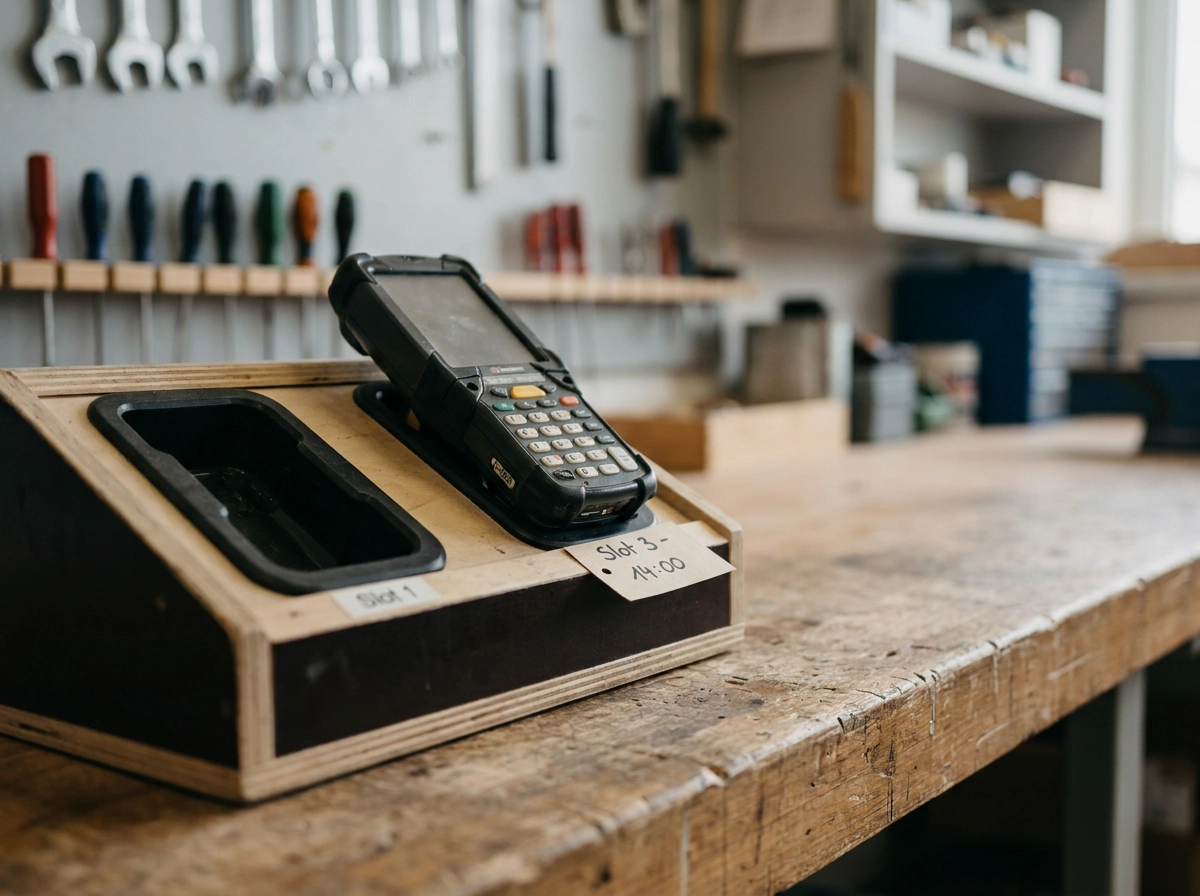
Priorities are set; now you just need the schedule. We swear by fixed slots rather than leaving things plugged in 24/7—again, practical experience, not an official mandate.
Everyone knows their slot in advance. That stops people cheekily plugging their phone in out of turn—it’s like pushing in at the buffet: let it slide once and trouble brews. One device per port, no daisychaining. Once something's fully charged, unplug it and put it away, don't leave it sitting there.
Only charge when someone is awake and keeping an eye on the hub. Sounds obvious, but it’s the easiest way to supervise. Keep the hub clear between slots. You’ll immediately see what still needs juice, and you won’t trip over a bird’s nest of wires in the morning. Here’s why daytime charging beats doing it overnight.
Why phones shouldn't stay plugged in overnight
Fixed slots work wonders, but there’s one we deliberately scrap: the overnight slot.
Safety authorities like the Swiss Fire Prevention Service (BFB) make it clear: most battery fires happen during charging, and they advise against charging unattended or overnight. That scraps the habit of leaving your phone plugged in while asleep. Our rule of thumb: charge phones during the last two hours before bed while everyone is still hanging out and keeping an eye on things. It's not academic dogma, just what works.
If you insist on charging at night, only do so supervised and on a fireproof surface. Unplug before shutting your eyes—no exceptions.
Cold charging is bad charging: after a chilly night, let batteries warm up first. Safety bodies recommend 10 to 30 °C as the safe operating window, while temperatures over 60 °C become dangerous.
And frankly? In our experience, you lose nothing by unplugging the moment your device hits 100%. All you gain is peace of mind and better sleep. Let’s look at how the slots pan out across the day.
The four campfire slots that actually work
The charging guard is sorted; now for the timing. Four slots have served us best:
Slot 1, Morning: Torches, power banks, and group gear go on charge as the sun comes up. In autumn these windows are shorter (see our autumn camping guide for details).
Slot 2, Midday to early afternoon: Downtime. Over 30 °C isn’t ideal charging weather anyway, so give gear that’s been baking in a tent a break.
Advertisement · See multi-port USB chargers on Amazon* Compare size, weight and reviews, and check the model suits your crew and your trip. *Affiliate link to Amazon search results: As an Amazon Associate we earn from qualifying purchases.
Slot 3, Early evening: Phones and the backup power bank, while everyone is awake and nearby.
Slot 4, Before turning in: Quick check, unplug everything, stow cables, and hand over the watch for tomorrow. The hub is left bare, letting you see at a glance what still needs charging.
These timings are practical guidelines, not laws. But they must apply to everyone, or the system falls apart.
Safety at the charging hub: non-negotiable rules
Once the plugs are pulled in Slot 4, we need to get serious for a moment. These rules are non-negotiable.
Base surface: Place your charging station on stone, a metal tray, or inside a fireproof container. Never directly on a tent groundsheet, roll mat, or sleeping bag.
Location: Never in tent doorways or escape routes. The exit must stay clear, especially if it pours and everyone rushes out at once.
Temperature: Charge around 10 to 30 °C, keeping cell temperatures under 60 °C. Let gear warm up after a freezing night, and cool down after sitting in baking sunshine.
Battery check: Look and feel. Any warping, cracks, swelling, or signs of a drop? Retire it immediately. Don't charge it, don't pack it, and don't bring it into the tent.
Chargers: Safety guidelines are clear: stick to original chargers. With communal cables, keep the box disciplined. This applies to power banks as well.
For more details, check our guides on battery safety and weatherproofing.
Cable management and hub placement: the tidy habits that save batteries
Beyond the safety rules comes the everyday habit that genuinely saves your kit: keeping things tidy. Give each person their own cable colour and a labelled pouch. Anything dumped into a shared bag belongs to nobody and gets wrecked by everybody. Never thread cables through tent poles, zips, or underneath the groundsheet. Pinched or kinked wires are prime culprits for broken cables and short circuits. Set up the hub raised off the ground and shielded from rain—away from puddles and wet grass right at the tent entrance. Use velcro ties instead of knots: knots damage connectors, while velcro lasts for years and is easy to undo in the pitch black. And prevent trip hazards: cables running across the seating area are an accident waiting to happen at night, and during the day, they're the quickest way to snap a port. Get this right, and being on charging duty is a breeze.
The charging guard: one person, one job, a tranquil evening
Cables tidy, hub positioned. Now you just need someone paying attention. Pick exactly one charging guard per evening on rotation, with their name written clearly on the camp table. No guessing games, no 'I thought you were watching it'.
Their job is straightforward: keep an eye on the hub, place a hand on the casing occasionally to check for excessive heat, and unplug full devices. In the event of smoke, a popping sound, or an acrid smell, act immediately: never use water on battery fires, disconnect the device from the hub, keep your distance, and call emergency services if in doubt.
At handover, agree on three things: who takes over tomorrow, who’s reachable in their tent tonight, and where the emergency power bank is kept. If you're new to camping, check out our beginner's camping guide for everything else.
The social upside: with one person officially in charge, nobody has to nag five mates to pull their plugs. That’s the real trick.
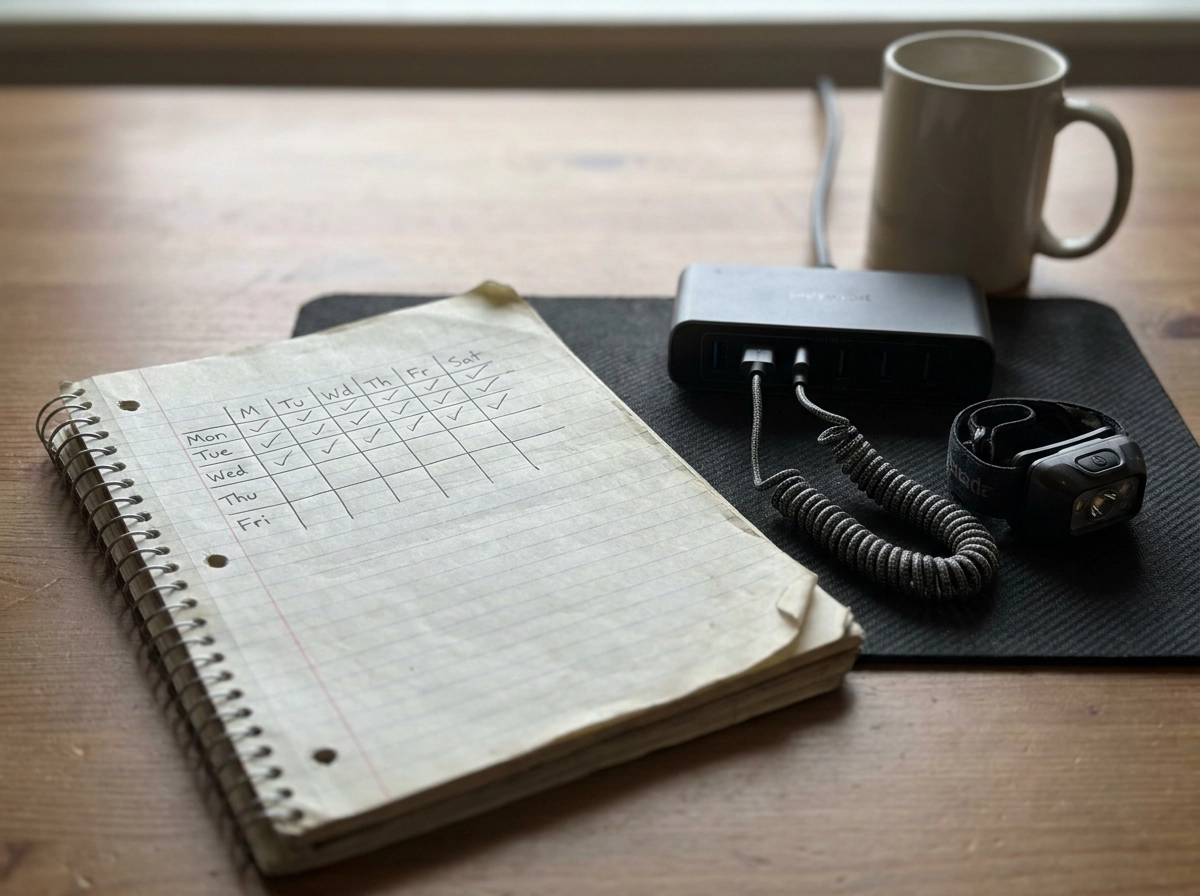
Your 4-day festival charging plan checklist
Guard appointed; all that’s left is the schedule to tick off as you go.
Day 0, Arrival: Set up the hub on a fireproof base, unpack the cable crate, assign the evening's charging guard, and give everything an initial full charge.
Day 1: Torches and communal gear in the morning; phones in the early evening. Jot down remaining capacity afterwards. To figure out how much juice you'll need, check out which power station really suits your camping trip.
Day 2: Same rhythm, now rotating the crew's power banks. Phones generally use far less juice than topping up a hefty power bank.
Day 3, Inspection day: Inspect cables and plugs, discard damaged ones, clean off the hub, and adjust time slots if routines have slipped.
Day 4, Departure: Don't start charging anything you won't finish. Pack everything away dry and clean, and return spare cables to the crate.
Common problems and quick fixes
What if things don't go strictly to plan? Here are some quick fixes.
Mixed connectors: USB-C, Lightning, Micro-USB, 12V. Pack exactly one cable per format in the communal crate; leave extras at home.
Power bank sat in a cupboard for months? Safety authorities note that the first charge after long storage is the most sensitive. Top tip: test it at home before chucking it in the car.
If a power bank suddenly drops from half to zero, it’s not magic. The battery management system (BMS) cuts output the moment the first weak cell drains, even if others still hold charge.
Have a fallback ready: Two smaller power banks beat one massive unit if the hub fails or a device gets damaged. Don’t panic, though—safety statistics show battery fires remain exceptionally rare relative to the sheer number in use.
Summary: four days, one plan, zero arguments at the hub
Enough worst-case scenarios. With a proper plan, charging becomes effortless routine—which was the whole point from the start.
Agree on priorities before you leave and display them clearly at camp. A note on the camping table is all it takes, as long as everyone can see it.
Only charge while awake, never overnight, always on a non-combustible base, and never in the tent doorway. Appoint one charging guard per evening on rotation, clearly noted on the plan.
Label cables, keep them organised, and discard damaged batteries. That way, the crew stays connected for four days and nobody ends up fumbling in the dark.
Read next: Solar or a bigger battery? The honest camping calculation
Hardly rocket science, is it? Just a simple schedule, a fireproof surface, and a few labelled cables. Come Sunday, nobody will be arguing over plugs.
Related camping guides
- Sleeping equipment and protection from wind and rain — match your sleeping setup to night-time temperatures and keep clothing and bedding dry.
- Rain and mud camping packing list — prepare waterproof layers, spare clothing and equipment for wet ground.
- Head torches, camp lighting and off-grid charging — compare lighting options for longer autumn evenings; treat solar charging as a weather-dependent supplement.
- Simple hot meals for chilly camping days — find one-pot recipes and food that keeps without a fridge.